 how-to
How to Improve Posture While Working From Home
Table of Contents
- Why Posture Matters When Working From Home
- Step 1: Assess Your Current Posture and Workstation
- Step 2: Optimize Your Ergonomic Desk Setup Tips
- Step 3: Implement Stretches for Desk Workers
- Step 4: Take Regular Movement Breaks Throughout Your Day
- Step 5: Use Posture Tools and Budget-Friendly Hacks
- Common Mistakes to Avoid When Correcting Your Posture
- When to Seek Professional Help for Chronic Pain
- Frequently Asked Questions
Last Updated: October 1, 2026
Why Posture Matters When Working From Home
Poor posture while working from home creates pain that compounds over time. Your spine isn't designed to slouch for eight hours straight, and remote work removes the subtle cues, coworkers, movement between rooms, social pressure, that encourage better positioning. (Source: Occupational Safety and Health Administration (OSHA) guidelines)
Chronic neck pain, lower back strain, and tension headaches build gradually from weeks of poor positioning. At Natural Healing Arts Medical, we've worked with professionals experiencing these issues, aiming to help patients achieve their wellness objectives through effective, compassionate treatment options.
Sedentary work creates biomechanical stressors: shoulders round forward, your head drifts toward the screen, and your lower back loses lumbar support. These small deviations compound over months into musculoskeletal problems.
The good news: learning how to improve posture while working from home is entirely within your control. It requires no expensive equipment, no special supplements, and no lengthy treatment plans. It requires awareness, small adjustments, and consistent movement. This guide walks you through exactly how to do it.
Step 1: Assess Your Current Posture and Workstation
Most people don't realize how far their posture has drifted. You might think you're sitting straight when you're actually leaning forward by six inches.
Take a profile photo of yourself sitting normally at your desk. Check: Where is your head relative to your shoulders? Are your shoulders rolled forward? Is your lower back supported or rounded?
Next, evaluate your entire workstation setup:
- Desk height: Can you rest your forearms on the surface with your elbows at 90 degrees?
- Monitor position: Is the top of your screen at eye level, or are you looking down?
- Chair: Does it support your lower back, or do you sink into it?
- Lighting: Are you squinting at your screen or straining to see?
- Foot placement: Are your feet flat on the floor, or dangling?
Write down what you find, this is your baseline for measuring progress.
Step 2: Optimize Your Ergonomic Desk Setup Tips
Your workstation is the foundation of good posture. Create an environment where good posture is the path of least resistance.
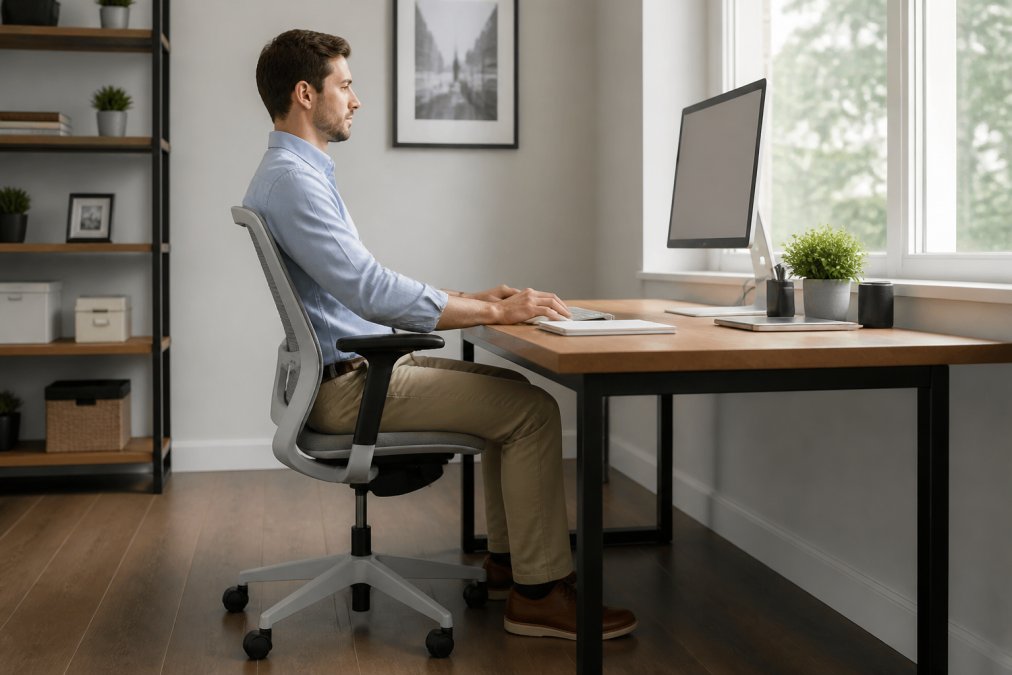
Adjust Chair Height and Seat Position
Your chair is the anchor point for everything else.
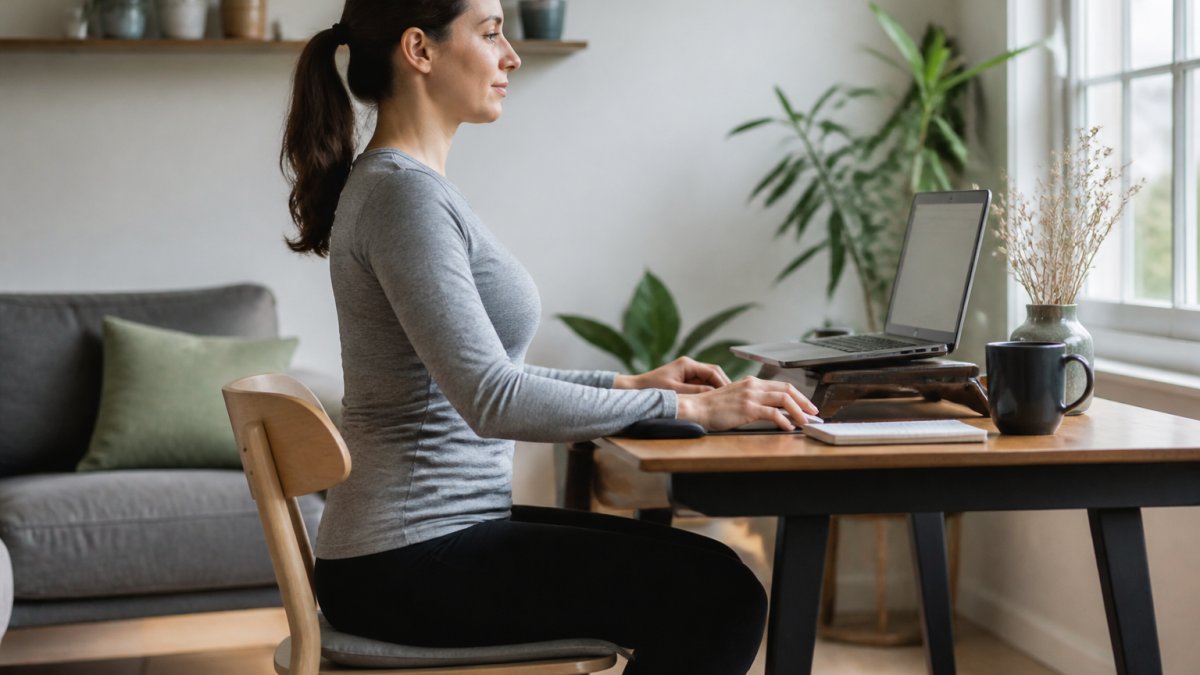
Sit with feet flat on the floor and thighs parallel to the ground. If your feet dangle, add a footrest. If thighs slope downward, raise the chair.
Your hips should be slightly higher than your knees, just a few degrees, to open your pelvis and reduce lower back strain.
Look for a chair with built-in lumbar support. If yours lacks it, a small pillow behind your lower back works.
Adjust seat depth so two fingers fit between the back of your knees and the seat edge, too deep cuts circulation, too shallow doesn't support your thighs.
How to Set Up a Monitor for Ergonomics
Most people set the screen wherever it fits, then crane their neck to see it.
Position your monitor directly in front of you at arm's length, with the top at eye level. For laptops, use a monitor stand or riser, the investment pays for itself in reduced neck strain.
For multiple monitors, center the one you use most and angle secondary screens to prevent excessive neck rotation.
Adjust brightness to match room lighting and position your screen perpendicular to windows to reduce glare, which forces forward leaning or squinting.
Position Your Keyboard and Mouse
Keyboard and mouse position determines arm and wrist extension, get this wrong and you'll develop repetitive strain injuries.
Position your keyboard directly in front of you with elbows at 90 degrees and wrists neutral, not bent up, down, or to the side.
Place the mouse at keyboard height, immediately to the right or left, to avoid shoulder strain and torso misalignment.
Never use a laptop keyboard, it's too low and too close to the screen. Use an external keyboard and mouse instead.
Step 3: Implement Stretches for Desk Workers
Stretching prevents muscles from adapting to poor positioning. Flexible muscles allow you to return to neutral spine more easily.
Consistency matters: five minutes twice daily beats thirty minutes once a week. Counteract the forward-leaning posture that desk work creates.
Neck and Shoulder Stretches
Your neck and shoulders tighten first from forward-leaning posture and cause the most obvious pain.
Neck flexion stretch: Sit upright and slowly bring your chin toward your chest. Hold 20 seconds. Repeat three times.
Lateral neck stretch: Tilt your head to the right, bringing your right ear toward your shoulder. Hold 20 seconds. Repeat on the left side. Do three reps per side.
Shoulder roll: Roll your shoulders backward in slow circles for ten reps, then reverse. This releases upper back tension.
Doorway chest stretch: Stand in a doorway with your right forearm on the frame at shoulder height. Step forward until you feel a stretch across your chest. Hold 20 seconds. Repeat on the left side. Do three reps per side.
Lower Back and Hip Stretches
Tight hip flexors pull your pelvis forward and flatten your lumbar curve.
Seated spinal twist: Cross your right leg over your left and place your left elbow on your right knee. Gently twist right. Hold 20 seconds. Repeat on the other side. Do three reps per side. (Source: National Institute for Occupational Safety and Health (NIOSH) recommendations)
Piriformis stretch: Place your right ankle on your left knee and gently lean forward. Hold 20 seconds. This stretches the deep hip muscle that triggers lower back pain. Repeat on the other side.
Quadriceps stretch: Stand on your left leg. Grab your right foot and bring it toward your glute. Hold for 20 seconds. Repeat on the other side. Tight quadriceps pull on your knee and affect your pelvic tilt.
Cat-cow stretch: Get on your hands and knees. Arch your back and look up (cow pose). Then round your spine and tuck your chin (cat pose). Alternate slowly for 10 reps. This mobilizes your entire spine and reverses hours of forward slouching.
Step 4: Take Regular Movement Breaks Throughout Your Day
Stretching and good posture mean nothing if you sit motionless for eight hours. Your body needs dynamic sitting and frequent position changes.
The rule is simple: move every 30 minutes. This doesn't mean a workout. It means standing up, walking around, or changing positions.
Set a timer on your phone or computer. Every 30 minutes, stop working. Stand up. Walk to the kitchen. Walk to another room. The movement itself matters less than the frequency. You're breaking up static posture and forcing your body to engage different muscle groups.
During these breaks, do light movement. Walk around your home. Climb a few stairs. Do a few squats. Anything that gets your body out of the seated position resets your postural muscles and prevents fatigue.
If you sit for longer than two hours without a break, your postural muscles fatigue. Fatigued muscles can't hold good posture. This is why people slouch more as the day goes on. The solution is consistent, frequent breaks.
Many people resist this because they think they'll lose productivity. The opposite is true. Movement breaks improve focus and reduce the afternoon energy crash. You'll actually accomplish more.
Step 5: Use Posture Tools and Budget-Friendly Hacks
You don't need expensive equipment to improve your posture. A few simple tools make the process easier.
Lumbar support pillow: A small pillow or rolled towel behind your lower back supports your natural lumbar curve. Cost: under $20. Impact: significant for people with lower back pain.
Monitor stand: Elevates your screen to eye level.
Budget-friendly hacks that work just as well:
- Stack books under your monitor to raise it to eye level
- Use a folded towel as lumbar support
- Place a small box under your desk as a footrest
- Use a standing desk made from a tall table or shelving unit
- Set phone reminders for movement breaks instead of buying a smartwatch
Common Mistakes to Avoid When Correcting Your Posture
Most people make the same errors when they try to fix their posture. Knowing these mistakes helps you avoid them.
When to Seek Professional Help for Chronic Pain
Most posture problems respond to self-directed fixes when you follow guidance on how to improve posture while working from home. But some don't. If you've made all the changes outlined in this guide and you're still experiencing pain after four weeks, professional evaluation is your next step.
Signs you should seek professional help:
- Pain that worsens despite posture improvements
- Pain radiating down your arm or leg
- Numbness or tingling in your hands or feet
- Pain that disrupts your sleep
- Pain that limits your daily activities
Frequently Asked Questions
How often should I take movement breaks to improve posture?
Move every 30 minutes for at least 2-3 minutes. Stand, stretch, or walk around your home to reduce postural fatigue and prevent musculoskeletal strain. Short, frequent breaks are more effective than one long break later in the day. These micro-break routines interrupt static posture and help maintain spinal alignment throughout your workday.
Can you correct years of bad posture?
Yes, but it takes consistent effort. Poor posture habits develop over months or years, so improvement requires ongoing practice with ergonomic adjustments, stretching, and movement. Most people notice better spinal alignment and reduced pain within 2-4 weeks of daily practice. For chronic pain or significant postural changes, consulting a chiropractor can accelerate your progress and ensure your corrections are biomechanically sound.
What is the 90-90-90 rule for sitting?
The 90-90-90 rule means your hips, knees, and elbows should all bend at approximately 90-degree angles when seated. Your feet should rest flat on the floor, thighs parallel to the ground, and upper arms perpendicular to your torso. This neutral spine position reduces repetitive strain on your cervical spine, lumbar support area, and shoulders, making it the foundation for ergonomic desk work.
What are signs of poor posture while working from home?
Common signs include forward head posture (chin jutting forward), rounded shoulders, lower back pain, neck tension, and headaches. You may also notice fatigue by mid-afternoon or difficulty concentrating due to discomfort. If you catch yourself slouching, experience pelvic tilt, or feel pain after sitting for an hour, these are signals your workstation or movement habits need adjustment. Addressing these early prevents chronic musculoskeletal health issues.