 how-to
How to Set Up a Standing Desk Correctly
Last Updated: October 31, 2026
Quick Summary
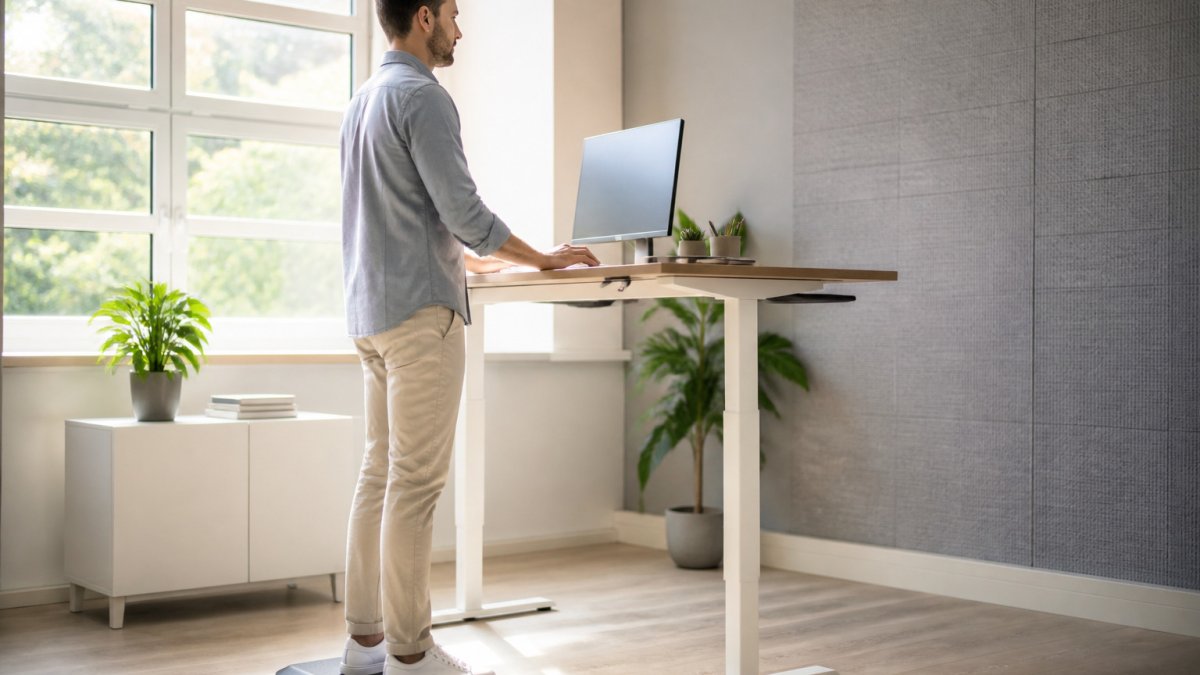
To set up a standing desk correctly, measure your standing elbow height in your work shoes and set the desk so your keyboard sits at that height. Keep wrists straight, place the top of the monitor at or just below eye level, and stand with feet hip-width apart and knees soft.
- Measure standing elbow height with a tape measure, with arms relaxed and elbow bent to 90 degrees.
- Set the desk so the keyboard sits at that height and wrists stay straight while typing.
- Place the monitor about an arm's length away, roughly 20 to 30 inches.
- Keep feet hip-width apart, weight evenly spread, and knees soft rather than locked.
- Build up standing time gradually and shift position every 20 to 30 minutes.
Table of Contents
- Why a Correct Standing Desk Setup Matters
- What You Need Before You Start
- Step-by-Step: Setting Your Standing Desk Height
- Keyboard, Mouse, and Wrist Alignment
- Positioning Your Monitor Height for Standing Desk Use
- Standing Desk Posture: Feet, Hips, Shoulders, and Neck
- How Long to Stand at a Standing Desk and Building Up Gradually
- Warning Signs and Your Next Step Toward a Comfortable Setup
- Frequently Asked Questions
Why a Correct Standing Desk Setup Matters
A standing desk can help you move more during the workday, but only if it is set up correctly. Getting the basics right is the first step toward a more comfortable workday. (Source: guidelines from the Occupational Safety and Health Administration (OSHA))
Setup matters because the body reacts to small misalignments that add up over hours. Leaning the head forward to read a screen or raising the shoulders to reach a keyboard both place extra load on the neck and upper back.
Many people assume that standing automatically fixes posture. In practice, standing still with locked knees and a hunched upper body can be just as tiring as sitting. Correct setup, plus regular position changes, is what makes a sit-stand desk useful.
- Poor setup often shows up as neck tightness, shoulder fatigue, or lower back pain
- A correct setup keeps your joints in a relaxed, neutral alignment
- Regular position changes matter as much as the initial adjustment
What You Need Before You Start
Before you adjust anything, gather the basic tools and check your workspace. You do not need expensive equipment, but a few items make the process easier.
- A sit-stand desk with a height range that covers your standing and seated heights
- A supportive chair, ideally one that adjusts in height and backrest angle
- An anti-fatigue mat if you will stand for long periods on hard flooring
Wear the shoes you normally work in. Flat, supportive footwear is a better choice than heels or slippers during setup. You can start with a chair you already own and upgrade later if needed.
Step-by-Step: Setting Your Standing Desk Height
Start with the desk height, because every other adjustment depends on it. The goal is a repeatable procedure you can re-run whenever you change shoes, swap chairs, or move the desk, not a one-time guess based on feel.
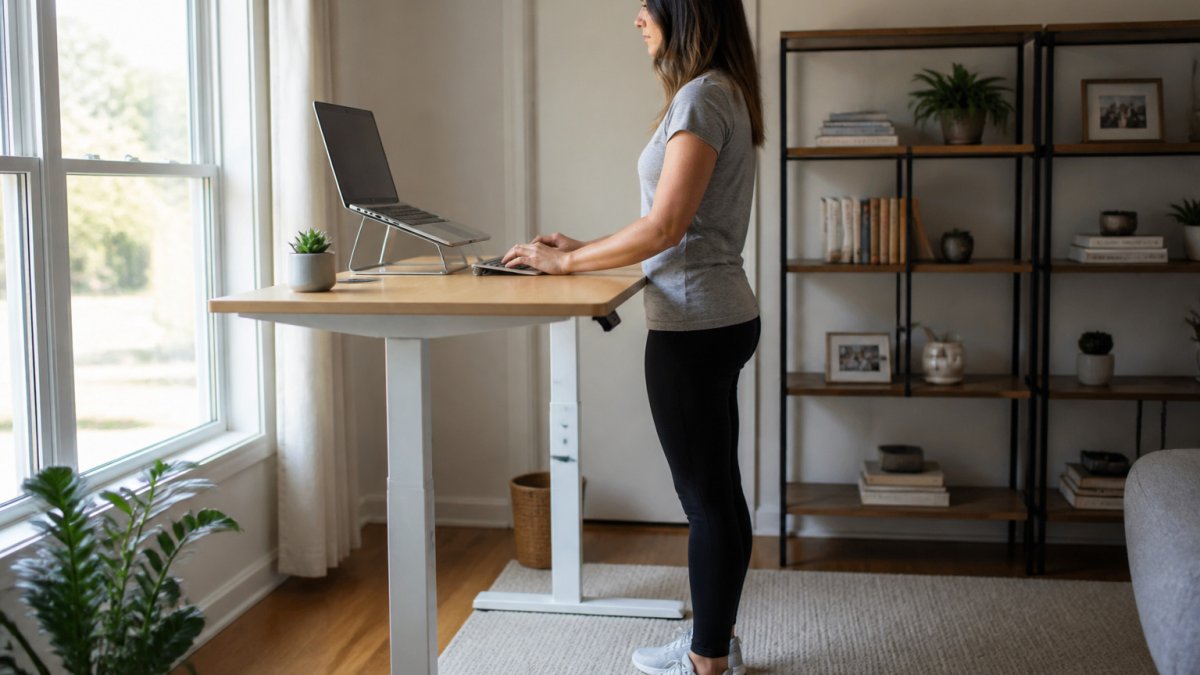
Measure first, then adjust
Before you touch the desk controls, take two measurements with a tape measure:
- Standing elbow height. Stand tall in the shoes you normally work in, let your arms hang relaxed, and bend one elbow to about 90 degrees. Measure from the floor to the underside of your bent elbow. This number is your target standing desk height for the work surface (the top of the desk where your keyboard sits).
- Seated elbow height. Sit in your chair with your feet flat on the floor and your back supported, then measure from the floor to the underside of your bent elbow the same way. This is your target seated desk height.
Write both numbers down. Most sit-stand desks let you save two presets, so program one for standing and one for sitting.
A common pattern is that people set the desk one to two inches too high because they measure to the top of the elbow rather than the underside, or because they measure while wearing different shoes than they work in.
The ordered setup sequence
Follow this order every time you reset the workstation:
- Set the desk to your standing elbow height. Stand with weight evenly spread across both feet, knees soft, and arms hanging at your sides.
- Place the keyboard and mouse. The keyboard should sit close enough that your elbows stay near your sides and your wrists stay flat. The mouse goes at the same height, right beside the keyboard.
- Set the monitor. With the desk at standing height, raise or lower the screen until the top of the display is at or just below eye level, and place it about an arm's length away (roughly 20 to 30 inches).
- Test for one minute. Type a real sentence and move the mouse. If your shoulders rise, the desk is too high. If your wrists bend upward to reach the keys, the desk is too low or the keyboard is too far away.
- Adjust in small increments. Change height by about one inch at a time and retest. Most people land slightly lower than their first guess.
Diagnosing common height errors
Use these checks to tell which adjustment is wrong:
- Shoulders creeping toward the ears: desk too high, or keyboard too far forward. Lower the desk about an inch, then pull the keyboard closer.
- Wrists bent up or down while typing: keyboard height or angle is off. A flat keyboard with wrists neutral is the target; a wrist rest is for pauses, not for typing.
- Head pushed forward toward the screen: monitor too far away or too low. Bring it closer and raise the top of the screen to eye level.
Matching the desk to your body, not the other way around
If your desk's height range does not reach your measured standing elbow height, do not compensate by hunching or reaching.
For readers who alternate between sitting and standing, set the seated preset using your seated elbow height and confirm the chair's armrests do not push your shoulders up when you type.
The steps below summarise the height setup sequence described above, with the checks for each stage.
| Step | What to do | Check or frequency |
|---|---|---|
| Measure standing elbow height | Stand in work shoes, bend elbow to 90 degrees, measure floor to underside of elbow | Re-measure when footwear or mat changes |
| Measure seated elbow height | Sit with feet flat and back supported, measure the same way | Save as seated preset |
| Set desk to standing height | Stand with weight even, knees soft, arms hanging | Target is the work surface height |
| Place keyboard and mouse | Keep keyboard close, elbows near sides, mouse level with keyboard | Wrists straight while typing |
| Set monitor | Top of screen at or just below eye level, about 20-30 inches away | Recheck after each height change |
| Test for one minute | Type a real sentence and move the mouse | Shoulders rising means desk too high |
| Adjust in small increments | Change height by about one inch at a time | Retest after every change |
Keyboard, Mouse, and Wrist Alignment
Once the desk height is set, position your keyboard and mouse so your wrists stay straight. Place the keyboard directly in front of you, close enough that you do not have to reach.
- Keep wrists straight, not bent up or down
- Keep the keyboard close enough that your elbows stay near your sides
- Place the mouse at the same level as the keyboard
If you use a laptop, consider a separate external keyboard and mouse. A laptop screen placed at a comfortable height is usually too low for the keys, which pushes the head and wrists into awkward positions.
Positioning Your Monitor Height for Standing Desk Use
Your monitor should sit at eye level, with the top of the screen at or just below your eye line. This keeps the neck in a neutral position instead of tilted forward or back.
Monitor height is easy to overlook when you change desk height. Many readers find they need a monitor riser or an adjustable arm to match their new standing position.
Standing Desk Posture: Feet, Hips, Shoulders, and Neck
Good standing posture starts at the feet and moves upward. Stand with your feet about hip-width apart, weight evenly distributed, and knees soft rather than locked.
Your neck should sit in line with your spine, with the chin level rather than pushed forward.
- Feet: flat, hip-width apart, weight spread evenly
- Hips: stacked over the feet, not tucked or pushed forward
- Shoulders: relaxed, not raised toward the ears
A small footrest or anti-fatigue mat can make it easier to shift weight and keep the feet comfortable.
How Long to Stand at a Standing Desk and Building Up Gradually
Standing for long periods is a new demand on your body, so build up slowly. There is no single correct ratio of sitting to standing. Recommendations you see online vary widely, and the right schedule depends on your baseline fitness, footwear, floor surface, any joint or circulation issues, and how much you move outside work. Treat any published interval as a starting point to test, not a rule.
A flexible progression you can adapt
Instead of a fixed weekly ladder, use a progression that responds to how you feel:
- Start with short, frequent standing blocks. Many people begin with 10 to 15 minutes of standing per hour and sit for the rest. The point is frequency, not duration.
- Add time only when the previous block felt easy. If 15 minutes left your legs or lower back tired, repeat that block for several days before extending it.
- Alternate rather than accumulate. Two or three shorter standing blocks spread across the day are usually easier to tolerate than one long block.
- Back off when you need to. A day with more sitting after a sore day is not failure; it is part of the adjustment.
A common pattern is that people feel fine for the first week, overdo it in the second, and then abandon the desk entirely. Slower progress tends to stick better than an aggressive ramp.
What the evidence does and does not say
Public health guidance generally encourages reducing prolonged sitting and adding light movement through the day, but it does not prescribe one standing-to-sitting ratio for desk workers. Research on sit-stand desks is mixed on long-term health outcomes, and breaking up long periods of any single posture is generally considered more useful than hitting a specific number of standing minutes. In practice, that means your schedule should include frequent position changes, not just a longer standing block.
Signs your schedule is too aggressive
Adjust your progression if you notice:
- Leg fatigue or foot soreness that lasts into the next morning
- Lower back ache that builds steadily during a standing block
- Swelling in the feet or ankles by the end of the day
These are signals to shorten the standing blocks, add an anti-fatigue mat, or check your footwear and floor surface. If symptoms persist despite these changes, or if you have a circulation, joint, or mobility condition, talk with a qualified healthcare professional before extending your standing time.
When standing is not the right goal
Some people cannot comfortably stand for long periods, whether because of pregnancy, a recent injury, arthritis, or another health condition. For those readers, the better goal is frequent position changes within a seated setup: adjust the chair, shift weight, stand briefly with support, and take short walking breaks. A standing desk is one tool for changing posture, not a requirement for a healthy workday.
Warning Signs and Your Next Step Toward a Comfortable Setup
Pay attention to signs that your setup needs adjustment. Common warning signs include:
- Neck, shoulder, or upper back pain that gets worse during the day
- Numbness or tingling in the hands or arms
- Lower back or leg pain that does not ease with position changes
Small adjustments often help, but persistent pain should not be ignored. If discomfort continues despite changes to your setup, consider talking with a qualified healthcare professional. A chiropractic evaluation can help identify the cause of neck pain, back pain, and posture-related headaches, and you can schedule an appointment with Natural Healing Arts Medical to discuss your symptoms. This article is general information and does not replace individual medical advice.
Frequently Asked Questions
How high should a standing desk be?
Most people set a standing desk so their elbows bend at roughly 90 degrees with forearms level and shoulders relaxed. For a person standing with flat shoes, that usually means the work surface lands near elbow height. Because body proportions vary, use this as a starting point and adjust the desk until your wrists stay straight and your shoulders do not rise while typing. Many adjustable desks have a height display or memory presets, which make it easy to return to a comfortable position.
Where should your monitor be positioned at a standing desk?
Place the top of the screen at or slightly below eye level, roughly an arm's length away. This lets your neck stay in a relaxed, neutral position rather than tilting down or craning up. If you use a laptop, a stand or external monitor raises the screen so you are not looking down at it. Adjust the monitor height separately from the desk, since the ideal screen position often differs from the ideal keyboard position.
How long should you stand at a standing desk?
Most people who are new to standing at work begin with short periods, such as 15 to 30 minutes at a time, and build up gradually over several weeks. Sitting and standing can be alternated throughout the day, and switching positions regularly is often more useful than standing for long stretches without a break. If you notice persistent foot, leg, or back discomfort, shorten your standing periods and speak with a qualified healthcare professional about your individual needs.
Do you need an anti-fatigue mat for a standing desk?
An anti-fatigue mat is not required, but many people find it makes standing for longer periods more comfortable, especially on hard floors. Choose a mat with enough firmness to support your feet without making you rock or sway. Supportive, flat shoes can also help. If standing causes ongoing discomfort, consider discussing your symptoms with a qualified healthcare provider to identify the cause.
Setting up a standing desk correctly takes a few careful adjustments, but the payoff is a workday that feels better in your neck, shoulders, and back. Start with desk height and elbow angle, then refine your keyboard, monitor, and posture. Build your standing time gradually, and watch for warning signs. If your discomfort persists, Natural Healing Arts Medical is ready to help you find a more comfortable path forward.