 how-to
Safe Yoga Poses for Lower Back Relief
Table of Contents
- Safe Yoga Poses for Lower Back Relief
- Gentle Yoga for Lower Back Pain: Beginner-Friendly Poses
- Yoga Modifications for Back Pain Relief
- Yoga Poses to Avoid With Lower Back Pain
- Lower Back Pain Yoga Sequence: A 15-Minute Routine
- Common Mistakes to Avoid
- When to Consult a Healthcare Professional
- Frequently Asked Questions
Last Updated: October 19, 2026
Safe Yoga Poses for Lower Back Relief
Lower back pain affects millions of people every year (the CDC). The good news is that safe yoga poses for lower back relief can help ease pain and build strength without medication or surgery. (Source: the Centers for Disease Control and Prevention (CDC))
At Natural Healing Arts Medical, we work with patients who want to manage back pain naturally. Yoga is one tool that complements chiropractic care and physical therapy.
This guide covers safe yoga poses for lower back relief that you can do at home. We'll show you beginner-friendly stretches, how to modify poses, and a simple 15-minute routine. You'll also learn when to stop and seek professional help.
Why Yoga Can Help Lower Back Pain
Yoga addresses the root causes of lower back pain. Tight muscles, weak core strength, and poor spinal mobility all contribute to discomfort. Gentle yoga stretches these tight areas and builds the muscles that support your spine.
The practice also teaches you how to move safely. Many people develop bad habits without realizing it. Yoga shows you proper alignment and breathing. This awareness helps you avoid re-injury in daily life.
Restorative poses calm your nervous system. When muscles are tense, they stay contracted. Relaxation poses let them release. This combination of strengthening and stretching creates lasting relief.
When to Seek Medical Care Before Starting
Not everyone should start yoga immediately. If you have severe pain, numbness, or tingling down your leg, stop and see a healthcare professional first.
Recent injuries also need professional evaluation. If you were in an accident or lifted something heavy and felt a sudden sharp pain, get checked before beginning any exercise routine.
People with osteoarthritis, spinal stenosis, or spondylolisthesis should consult their doctor. These conditions require specific modifications. A healthcare provider can tell you which poses are safe for your situation.
If you're unsure, it's better to ask. A quick consultation prevents injury and ensures you're doing the right movements for your specific condition.
Gentle Yoga for Lower Back Pain: Beginner-Friendly Poses
These poses are beginner-friendly and generally safe for axial lower back pain. Start with 2 to 3 poses per session, hold each for the time listed, and breathe continuously. Never force a stretch. If pain radiates down your leg or sharp pain appears, stop and review the screening section above.
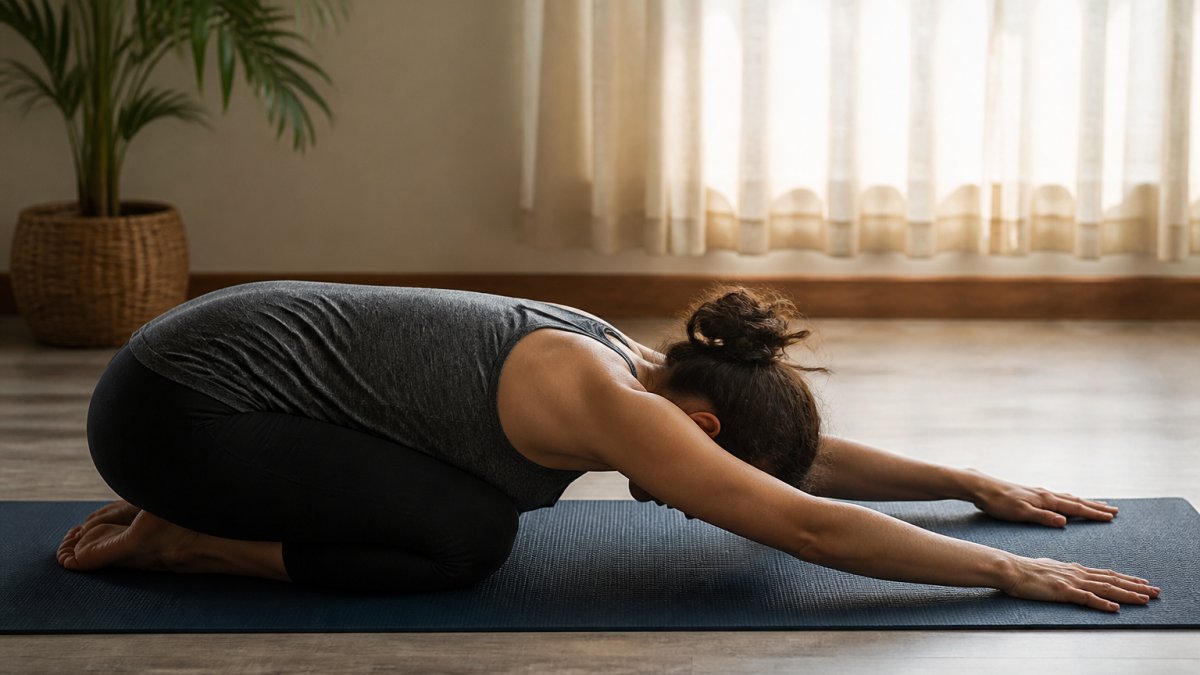
Child's Pose (Balasana)
Setup: Kneel on a mat with big toes touching and knees hip-width apart. Sit hips back toward heels.
Breath and duration: Inhale through the nose for 4 counts, exhale for 6 counts. Hold 30 seconds to 1 minute. Repeat 2 times.
Exit: Press hands into the mat, lift your torso with an exhale, and return to kneeling.
Modifications: Place a pillow or block under the forehead if it does not reach the mat. Place a folded blanket between calves and thighs if knees or hips feel tight.
Contraindication note: If you are extension-sensitive (spinal stenosis), keep the spine long rather than rounding; if flexion-sensitive (disc irritation), keep the rounding gentle and short.
Cat-Cow (Marjaryasana-Bitilasana)
Setup: Start on hands and knees. Wrists under shoulders, knees under hips. Keep the spine neutral.
Movement and breath: Inhale to Cow, drop the belly, lift the chest and gaze, and gently arch. Exhale to Cat, round the spine, tuck the chin, and draw the belly in.
Exit: Return to a neutral tabletop position, then sit back to Child's Pose or press back to kneeling.
Modifications: Place a folded blanket under the knees. If wrists hurt, make fists or use forearms on a block. Keep the range small, smooth motion matters more than depth.
Contraindication note: If extension worsens your pain, reduce the Cow arch; if flexion worsens it, reduce the Cat round.
Bridge Pose (Setu Bandhasana)
Setup: Lie on your back with knees bent and feet flat, hip-width apart, about 12 inches from the buttocks. Arms rest at your sides, palms down.
Movement and breath: Inhale, press feet into the floor, and lift hips a few inches. Exhale to lower.
Exit: Exhale as you roll down one vertebra at a time, then hug knees to chest for 3 breaths.
Modifications: Place a block under the sacrum for a supported bridge and rest 30 to 60 seconds. Keep the lift moderate, do not push hips high.
Contraindication note: Avoid if you are extension-sensitive or have spondylolisthesis; use a supported bridge with a block instead of an active lift.
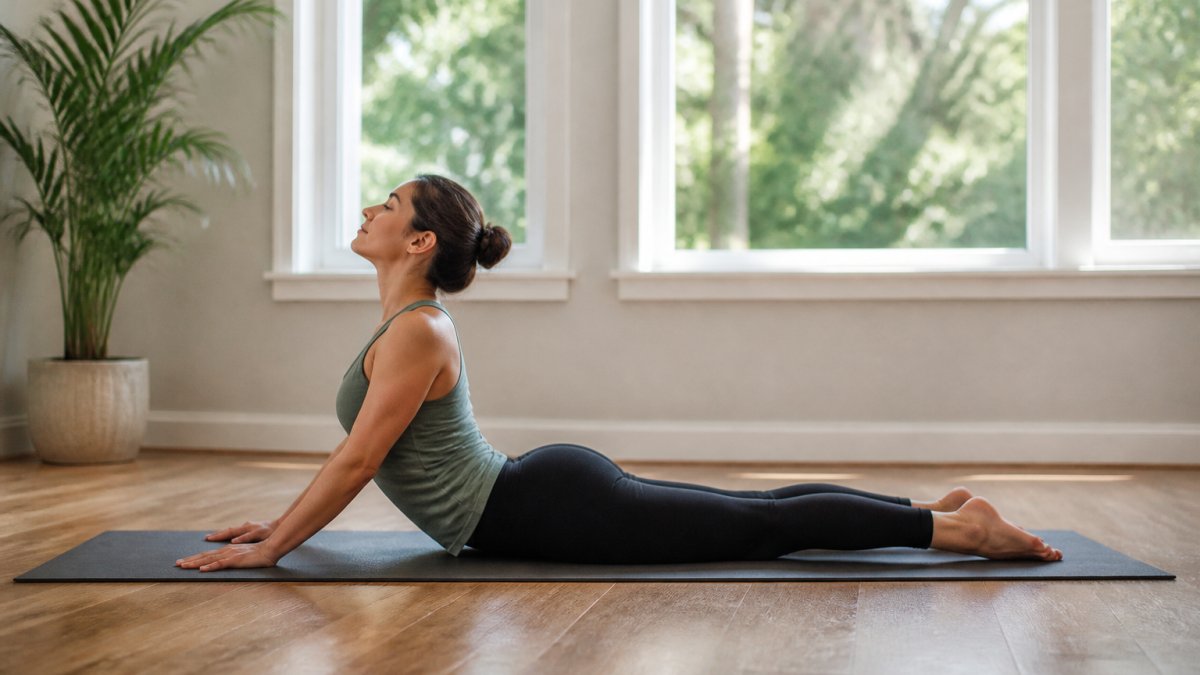
Sphinx Pose
Setup: Lie on your stomach with forearms flat, elbows under shoulders. Pelvis stays on the floor.
Movement and breath: Inhale, press forearms down, and lift the chest slightly. Exhale to soften. Hold 20 to 30 seconds, breathing evenly.
Exit: Exhale, lower the chest, and turn the head to one side for a few breaths before pushing back to Child's Pose. (Source: National Institute of Arthritis and Musculoskeletal and Skin Diseases (NIAMS))
Modifications: Place a folded blanket under the pelvis for support. Keep the lift small, a gentle extension, not a deep backbend.
Contraindication note: Skip this pose if you are extension-sensitive, have spinal stenosis, or feel sharp pain in the lower back. It is not appropriate for acute disc irritation with radiating symptoms.
Yoga Modifications for Back Pain Relief
Not all bodies are the same. Your yoga practice should fit your body, not the other way around. Props and modifications make poses accessible and safe.
Using Props and Support
Props are not a sign of weakness. They're tools that help you practice safely. Many experienced yogis use them.
Common props include:
- Yoga blocks: Place under your hands or hips to reduce the stretch
- Yoga bolster: Support your back in restorative poses
- Yoga strap: Help you reach further without forcing
- Pillows: Cushion your head or support your lower back
- Blankets: Add padding under your knees or hips
In Child's Pose, put a pillow under your forehead if it doesn't touch the mat. In Bridge Pose, place a block under your sacrum for extra support. These small changes make big differences in comfort and safety.
Breathing and Pacing
Breathing is the foundation of yoga. Proper breathing reduces tension and helps your muscles relax.
Practice this breathing technique:
- Breathe in slowly through your nose for a count of 4
- Hold for a count of 4
- Exhale slowly through your mouth for a count of 4
- Hold for a count of 4
- Repeat 5 to 10 times
Never hold your breath during stretches. This creates tension. Breathing deeply signals your nervous system that you're safe. Your muscles relax in response.
Start with just 5 minutes of yoga. Your body needs time to adapt. Gradually increase to 10 or 15 minutes as you get stronger. Rushing leads to injury.
Yoga Poses to Avoid With Lower Back Pain
Some poses put too much stress on your lower back. Avoid these until your pain is completely gone and you're stronger.
Skip these poses:
- Full forward folds: These put intense pressure on your lower spine
- Full backbends: Camel Pose and full Wheel Pose compress your lower back
- Deep twists: Seated spinal twists can aggravate disc issues
- Intense core work: Full sit-ups and crunches strain your lower back
- Standing balancing poses: These can cause you to arch your back for balance
- Upward-facing dog: This deep backbend is too much for injured backs
Listen to your body. If a pose causes sharp pain, stop immediately. Mild discomfort is normal, but sharp pain is a warning sign.
Lower Back Pain Yoga Sequence: A 15-Minute Routine
This sequence combines warm-up, strengthening, stretching, and cool-down. Do it 3 to 4 times per week for best results.
Warm-Up and Core Strengthening
Minutes 1-5: Warm-up
- Start in Child's Pose. Breathe deeply for 1 minute.
- Move into Cat-Cow Pose. Do 10 slow rounds, moving with your breath.
- Return to Child's Pose for 30 seconds.
Minutes 5-10: Core strengthening
- Lie on your back. Hug your knees to your chest for 30 seconds.
- Move into Bridge Pose. Hold for 1 minute.
- Rest on your back for 30 seconds.
- Do Bridge Pose again for 1 minute.
- Rest on your back for 30 seconds.
Spinal Mobility and Stretching
Minutes 10-13: Stretching
- Lie on your back. Hug one knee to your chest for 30 seconds. Switch legs.
- Move into Sphinx Pose. Hold for 20 to 30 seconds.
- Return to Child's Pose for 1 minute.
Cool-Down and Recovery
Minutes 13-15: Cool-down
- Lie on your back with your knees bent. Let your lower back relax into the floor.
- Take 10 slow, deep breaths.
- End in Corpse Pose. Lie flat on your back with your arms at your sides for 1 to 2 minutes.
This routine takes 15 minutes. You can do it in the morning or evening. Consistency matters more than intensity. Three times per week is better than one intense session.
Common Mistakes to Avoid
Many people hurt themselves by practicing yoga incorrectly. These mistakes are easy to fix once you know about them.
The biggest mistakes:
- Pushing too hard too fast: Yoga is not about how deep you go. It's about consistency and proper form.
- Ignoring pain signals: Mild discomfort is normal. Sharp pain is not. Stop if something hurts.
- Skipping the warm-up: Cold muscles are tight muscles. Always warm up first.
- Holding your breath: This creates tension. Breathe continuously throughout every pose.
- Comparing yourself to others: Your body is unique. Your practice should match your abilities.
- Not using props: Props are tools, not shortcuts. They help you practice safely.
The most common mistake is doing too much too soon. Your body needs time to adapt. Start with just 5 minutes. Add 5 minutes each week as you get stronger.
When to Consult a Healthcare Professional
Yoga helps many people, but it's not a replacement for professional care. Know when to seek help.
See a healthcare professional if:
- Your pain gets worse after a week of yoga
- You develop new symptoms like numbness or tingling
- Pain radiates down your leg
- You have trouble controlling your bladder or bowels
- Your pain follows an accident or injury
- You have pain at night that keeps you from sleeping
- Over-the-counter pain relief doesn't help
A chiropractor can assess your spine and recommend the best approach for your specific condition. At Natural Healing Arts Medical, we combine chiropractic care with safe movement practices like yoga.
Physical therapy is another valuable option. A therapist can teach you exercises tailored to your exact needs. They can also monitor your progress and adjust your routine as you improve.
Lower back pain doesn't have to control your life. Safe yoga poses for lower back relief, combined with professional chiropractic care, can help you regain strength and mobility.
Frequently Asked Questions
Which yoga poses are safe for lower back pain?
Child's Pose, Cat-Cow Pose, Bridge Pose, and Sphinx Pose are among the safest options for lower back pain relief. These poses gently stretch the spine, strengthen core muscles, and improve spinal mobility without excessive strain. Always move slowly and stop if you feel sharp pain. Modifications using props like pillows or blocks make these poses even safer for beginners.
How long should you hold a yoga pose for lower back relief?
Hold gentle poses for 20 to 60 seconds initially, gradually increasing to 1 to 2 minutes as your flexibility improves. Avoid pushing yourself too hard; pain is a signal to stop or modify. Breathing steadily throughout the hold helps relax muscles and reduces tension in the lower back.
Can gentle yoga help relieve lower back pain?
Yes, gentle yoga can help relieve lower back pain by improving spinal mobility, strengthening core muscles that support the lower back, and reducing muscle tension. Gentle stretches and poses promote flexibility and range of motion. However, results vary by individual and underlying cause. If pain persists or worsens, consult a healthcare professional or chiropractor for personalized guidance.
What should you do if a yoga pose makes your back pain worse?
Stop immediately and rest. Never push through sharp or intense pain. Try a modified version using props, reduce your range of motion, or skip that pose entirely. Document which poses cause discomfort and discuss them with a healthcare provider or certified yoga instructor. Some poses may not be suitable for your specific condition, and professional guidance can help you find safer alternatives.